So you finally have your model where you want it and you want to make sure you can always get it back to the same orientation. Saving the viewport.
Unlike if you had trouble saving rhino files or even learning how to turn on autosave, saving and exporting perspective views from the same angle is done within the Rhino file, without the need to save anything bu the original file on your hard drive.
This means the process can be done as you work on your Rhino model – perfect for demonstrating different iterations or progressions of a model all in the same place.
The process is simple too and you don’t have to worry about any additional file names like if you were saving RUI files in Rhino either.
contents
Save your viewport using the “NamedView” command
Before carrying on to the next step, make sure you have selected the perspective. You can do this by enlarging the perspective view to fill the page or just clicking on the “perspective” tab.
Once selected, the tab should appear darker than the rest of the viewports.
Step 1: Save your Rhino viewport. It is as simple as positioning your model how you want it and typing in the command line “NamedView”.

Step 2: Once you have typed in the command a dialogue box should open in which you can save your viewport by clicking the save icon that will look like this on the left hand side.

Step 3: Next, simply type in the name you would like to call the view. It can be as simple as calling it a custom perspective view like in the example.
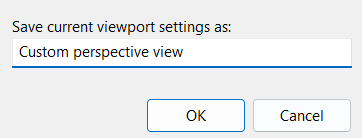
If you are working with a lot of views, organising them in terms of name systematically would be a good idea.
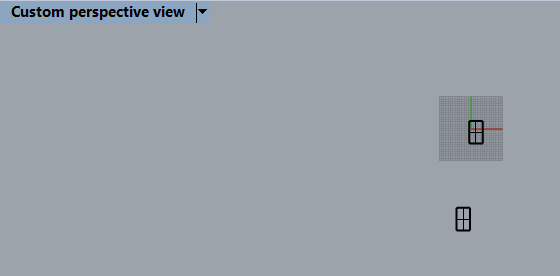
Step 4: Now you have saved your Named View, you can go to the Named Views dialogue box and double click on the saved view to bring it immediately back to the same position you saved it in.

Even if you save your file and come back to it later, the Named View will remain ready for your convenience to double click and maintain the viewing position.

How to export named views in Rhino
If you have saved your perspective view and adjusted your model to make it perfect but now you wonder how to export it into a render, this is where you have a couple of options to export your Named View.
Capturing the viewport like a screenshot in solution 1 will ensure you export the view exactly how you see it in Rhino.
In solution 2, making the view 2D and exporting it will export the model outline and line work instead.
Solution 1: Capture the viewport like a screenshot
In this method, use the Rhino command “ViewCaptureToFile”. This command captures the viewport you have selected like a screenshot exactly how you see it.

This will open a dialogue box where you can choose what viewport you want to export as well as at what pixel quality.
From there you can export it as an image to be further edited in another software such as Photoshop or you can leave the view as it is.
Before you do this, you may want to change the type of display to one that can be viewed easily like “rendered” or “arctic”.
To go a step further, you can also customise the object and grid shadow settings for even more of a realistic output. Click on the viewport drop down menu and go to “display options” to find how to adjust these settings.
Solution 2: Make the view 2d and export it
In this method, simply use the same method as if you were creating a line drawing for a section. Press “Ctrl + A” to select everything and then run the command “Maked2D”
This will give you some options that will help you export the model as it looks. For a start you want to make sure “view” is selected and “hidden lines” is deselected.

You can play around with the settings but this example shows an example of what your dialogue box could look like.
Once Rhino had generated the “Make2D” lines, go to your top view In Rhino to find where it has been placed, select these lines and run the “Export” command which will prompt you to select a scale, page layout and file type which you can toggle to your preference.

This is a professional, accurate way to export the line work of your saved customised perspective view in Rhino but will not display the actual model like in solution 1, just the line drawing.
How to reset viewports
Sometimes you may get carried away with the amount of Named Views and customised viewports and you just want to bring things back to the basics of having a top, front, left and right viewport so you can keep things clear and avoid getting errors.
In order to reset your canvas in Rhino simply run the “4view” command.

Even if you run this command by accident and you have your custom viewports saved, you can still double click on a named view to bring the viewport back.