
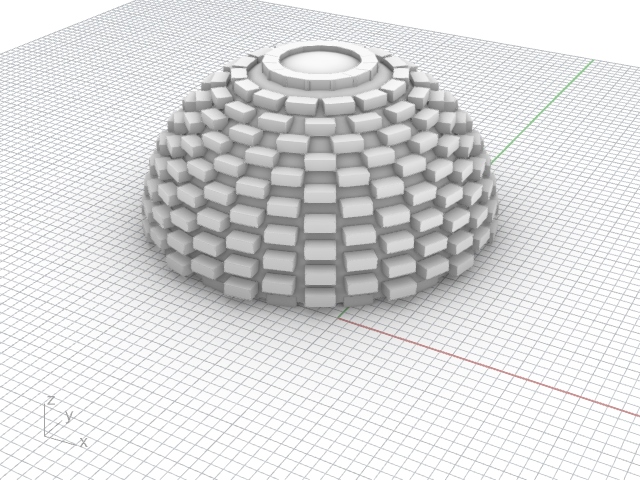
Brick domes are special pieces of architecture because they often don’t need a lot of structure and are self-supporting. But how can you create this in Rhino?
In this article, I not only walk you through how to create a dome like seen here but also, how to create a brick dome so you can create the design feature that is typical in things like churches, mosques and other religious structures.
There are a range of ways to do this including using the parakeet plugin and also using Rhino Vault. However, I found it easier to create the brick dome using only Grasshopper.
Create a brick dome step by step
Below, I will start by creating a simple dome and then using grasshopper to create the script that will construct bricks onto your dome.
Create the dome in Rhino
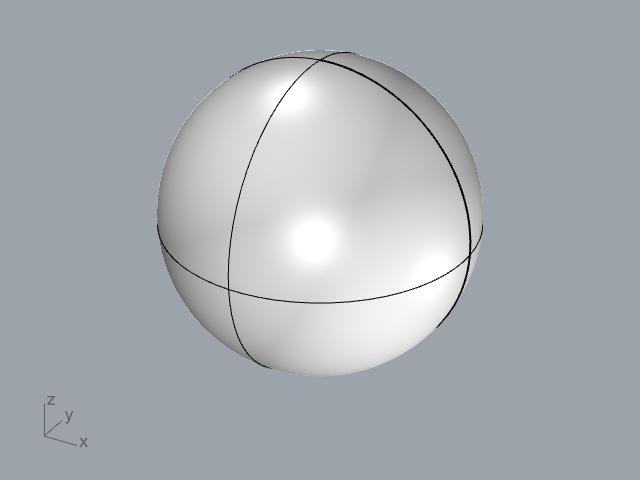
To begin, use the sphere tool by typing into the command line “Sphere” which will allow you to draw a sphere on your canvas that will later form the dome you will be using to create the brick dome.
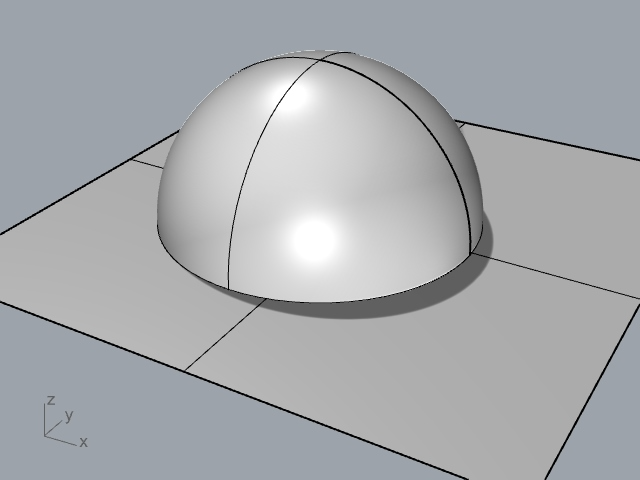
Cut the dome in half
Next, in order to convert your sphere into a dome, create a surface that splits the sphere in half like below and then execute the rhino command “Split”.
From here, you need to select the sphere as the object to cut and the surface as the cutting object. Then press Enter as prompted by the command.
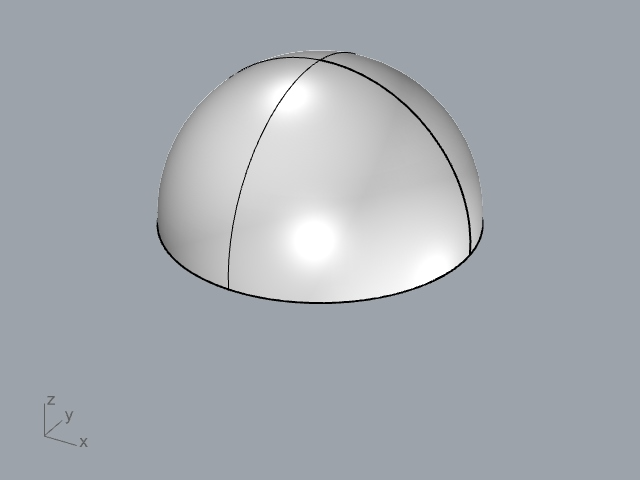
Delete the unnecessary shapes
Now you have done the “Split” command, you are able to delete the lower half of the sphere and the surface used to split. You should then be left with a simple dome.
If you are looking to create a more complicated type of dome, then use our tutorials on creating a geodesic dome or a tacoma dome. Or, for a more in depth tutorial on creating a dome in general, use our tutorial on this too.
However, next up you will need to begin adding in the brick texture which is the main purpose of this tutorial.
Open grasshopper
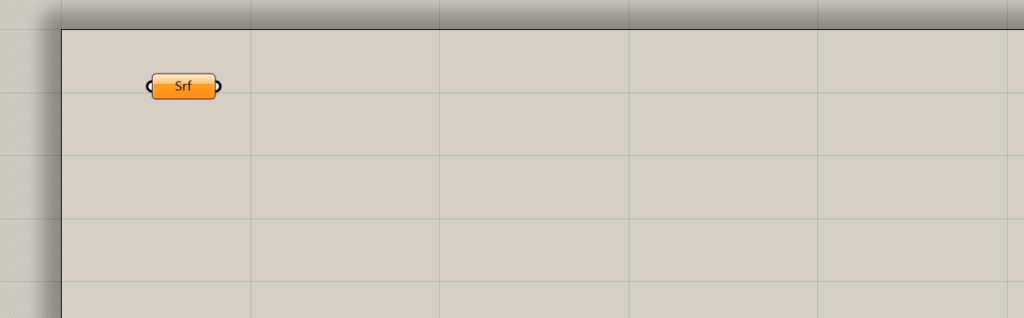
Open grasshopper in Rhino by typing in to the common line “grasshopper” and double clicking the canvas and adding in a “surface”.
Next. right click the surface and click “reparameterize” which should add a wave icon to your surface icon.
Set the surface
Right click the surface and select “Set one surface” from the menu and go to your Rhino canvas (rather than your grasshopper canvas) and select the dome you have created previously.
If you have done this right, the dome should turn red like below to show that it is selected in grasshopper.

Add the contours on to the surface
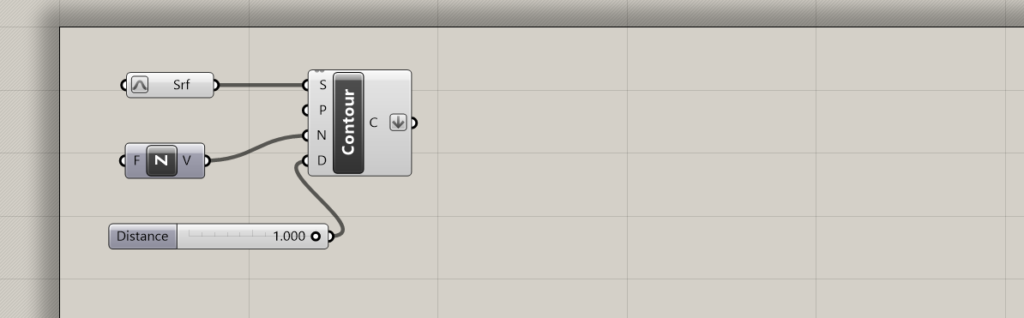
In order to create the lines that are where the bricks on the dome will be aligned to. First, add in the units “Contour” (for brep or mesh contours) which you should connect to the surface and then add in the “Unit Z” and the “Number slider” set to a number that gives you around 15 lines.
Also, right click the contour feature and click the option for “Flatten” which will give your icon a downward arrow as seen below.
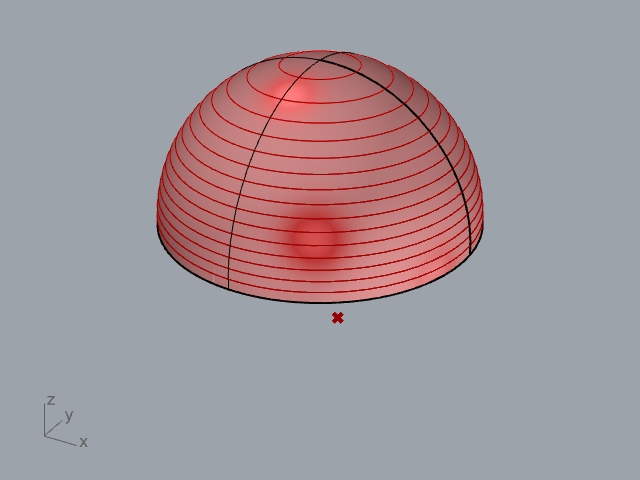
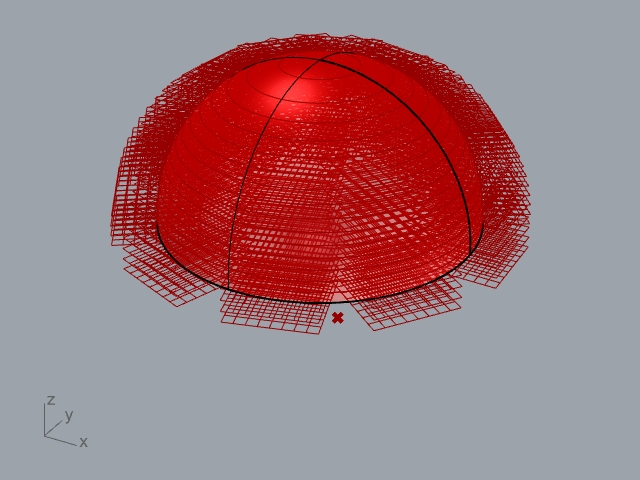
When done, your dome in Rhino should look like my dome below if your visibility is turned on correctly in grasshopper:
Add in the framework for the bricks
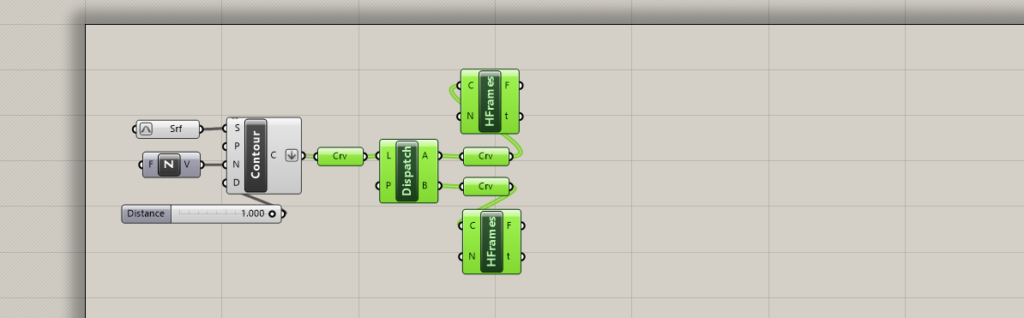
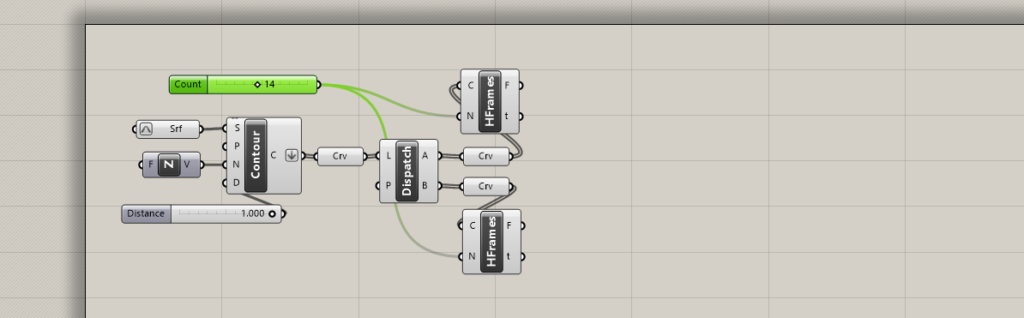
Afterwards, you will need to add in the placements for the bricks in grasshopper so begin by attaching a “Curve” component to the previously created contour component and then adding in a “Dispatch” icon.
Afterwards, attach the A and B sides of the dispatch icon to two “Curve” components which are both attached to a “Horizontal Frames” component so that your script looks like mine below:
Using this script, you should start to see your model have attachments which are where the bricks will come in in later steps as follows:
Get the right spacing of the brick framework
The first thing you should do in this step is add in the “Number Slider” component, right click and change the setting so numbers go up to 30 (This is what I have done but it will depend on the scale of your Rhino model).
Then, simply drag the number slider up until you have an even distribution of brick frames around your dome with as little gap as possible.

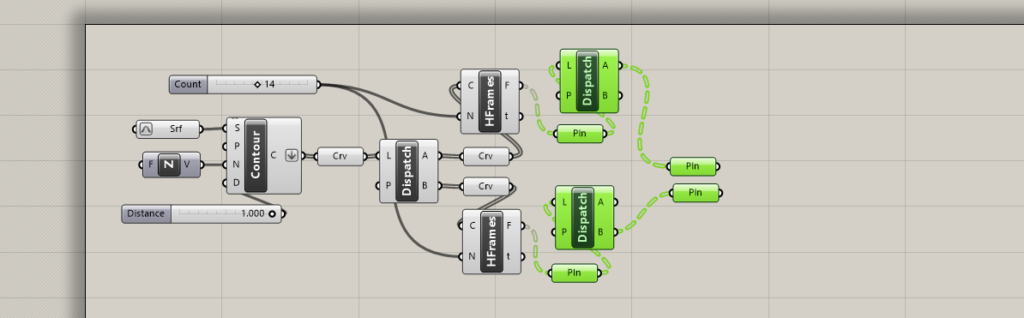
After you have the correct spacing, add in the “Plane” components and “Dispatch” components in the following arrangement where you have four new planes and two new dispatches added:
Make the bricks
In order to add the bricks to your dome, you will have to first design them by double clicking the canvas and typing in “Domain box” which is attached to three “number sliders” that dictate its dimensions.
Again, I right clicked and edited the number slider so that the dimensions made sense relative to the size of brick I wanted to create.
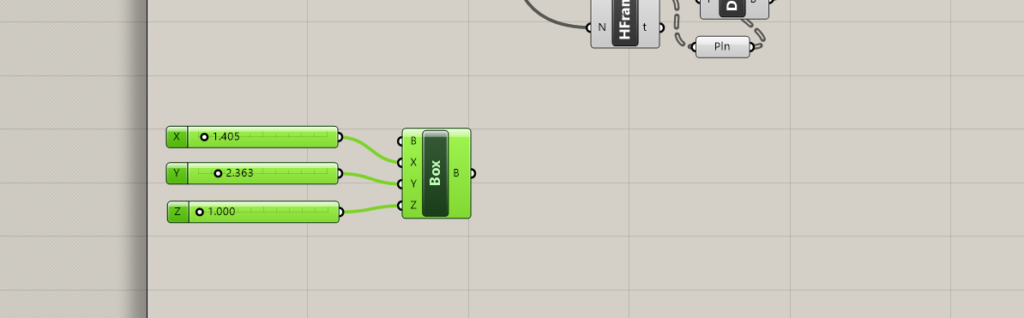
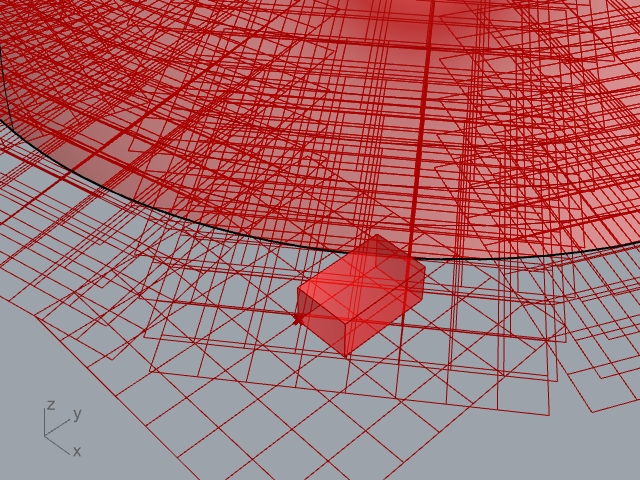
I created this section of the script underneath the previous script as a separate chain of components. You are able to adjust the sliders to change the size of the brick and see the result in Rhino if you zoom in to the base of your dome like below.
Assign the brick to the framework
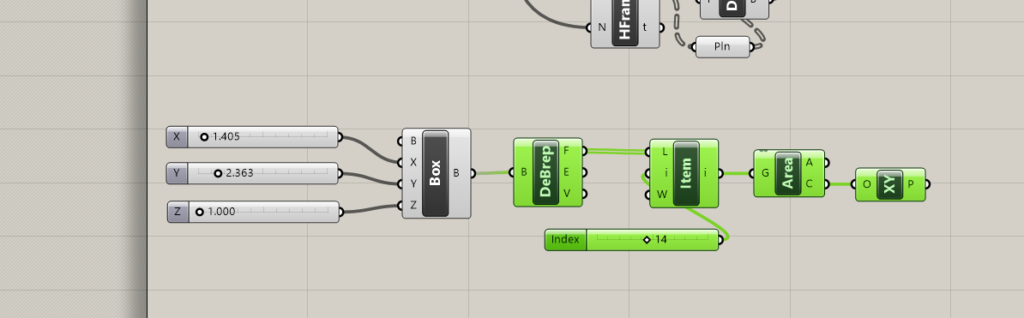
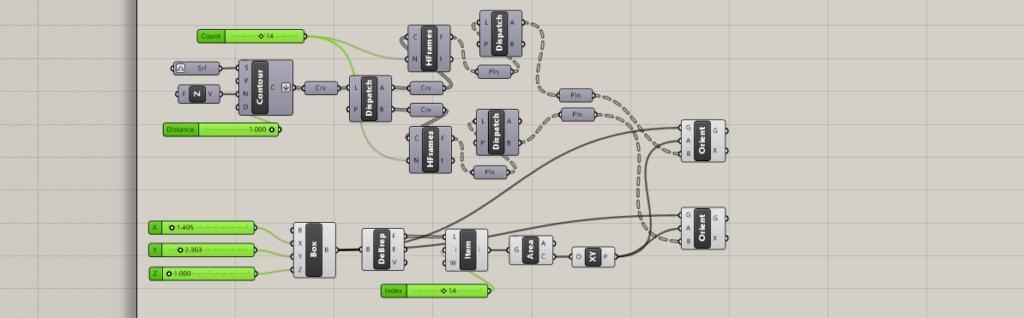
After you have decided on the dimensions for your bricks, you should add them to the frame you created earlier. To begin, I connect the box to the component “Deconstruct brep” and connect this to a “List item”.
As usual, create a customized “Number Slider” to add to the list item and connect this to the “Area” component and “XY Plane”.
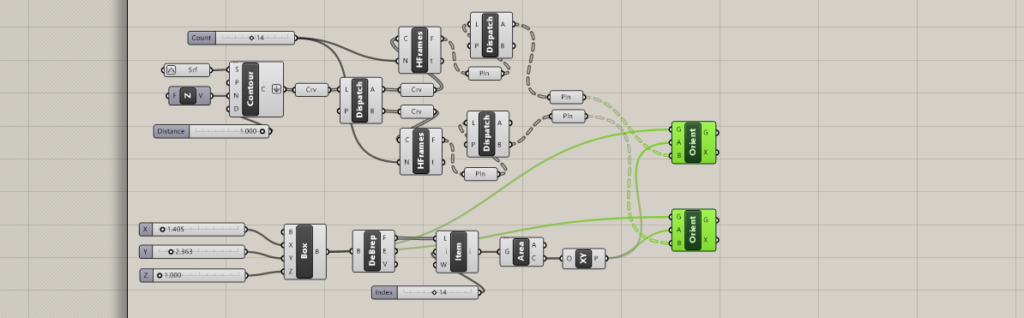
Next, you need to create two “Orient” components and then connect them in a certain way. First, connect the XY plane component to both Orient components using the A input.
Then, I connected both orient components to the box using the G input. And finally, connected both orient components to the surfaces I created earlier in the previous script using the B input as below.
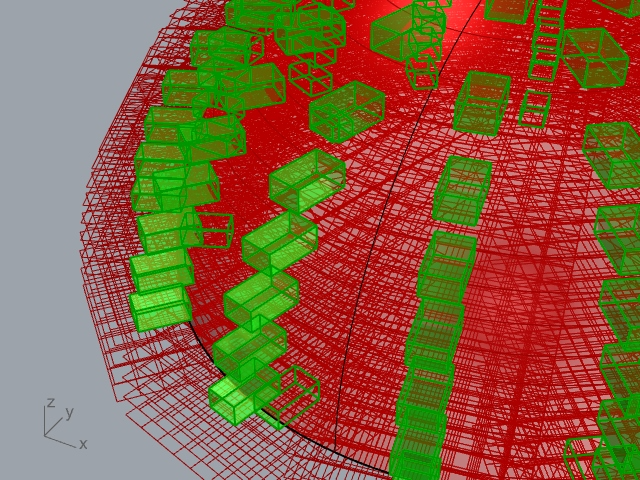
Follow this carefully as it is easy to make a mistake here. Once done, your bricks should start to show up on your dome in your Rhino canvas.
Finalize the distance between bricks
As you can tell from the previous steps, my model is not displaying the bricks I wanted correctly. Below, I have highlighted all the number sliders you should toggle and edit in order to get the right brick arrangement.
This will take some time to get everything looking perfect. And you may need to hide the visibility of the upper half of your script as I did in order to see what you’re doing. So have a play around with toggles and distances.
This should be fairly straightforward and when you’re done your model should look something like below
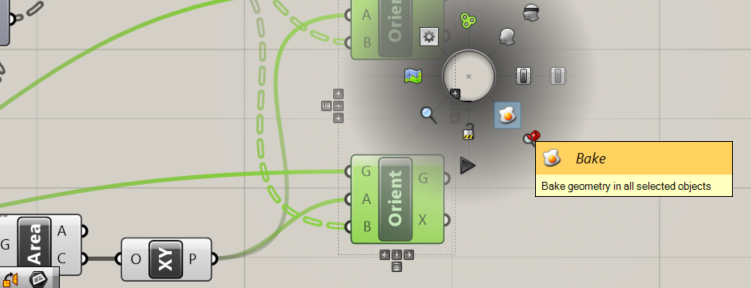
Bake the script into your model
In order to Bake your rhino model, the process is fairly simple. I selected the “Orient” components in the Rhino model by holding down shift.
Then, pressed down the middle mouse button and dressed the bake option which has an egg icon and chose the relevant layer I wanted to bake it into in Rhino.
It is up to you whether to keep the dome surface or delete it but I think it looks better with it there rather than having floating bricks and no structure to your model.
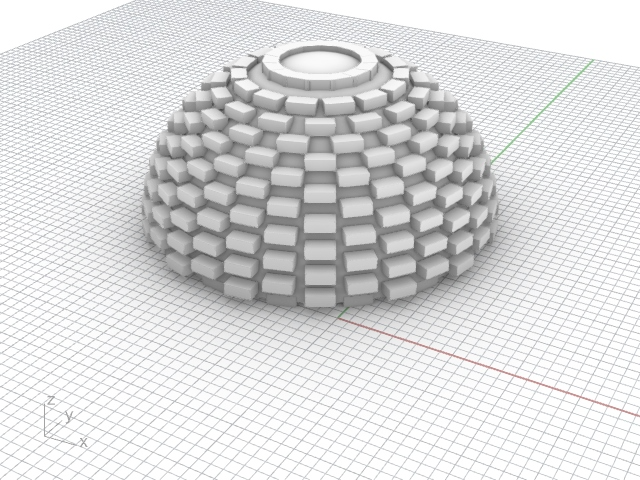
Once done, I turned off the visibility of the grasshopper script and rendered the model in the setting I wanted.